Mastering Bubble and OpenAI API Integration for Your App Development
Bubble and OpenAI API Integration: A Developer’s Guide
Since I’ve been sharing my experiences with AI integration in Bubble, one question keeps popping up in my inbox: “How do I connect OpenAI to Bubble?” Today, I’m breaking down everything you need to know about bringing AI into your Bubble apps, answering the most common questions I get from fellow developers.
Can You Really Integrate AI into Bubble?
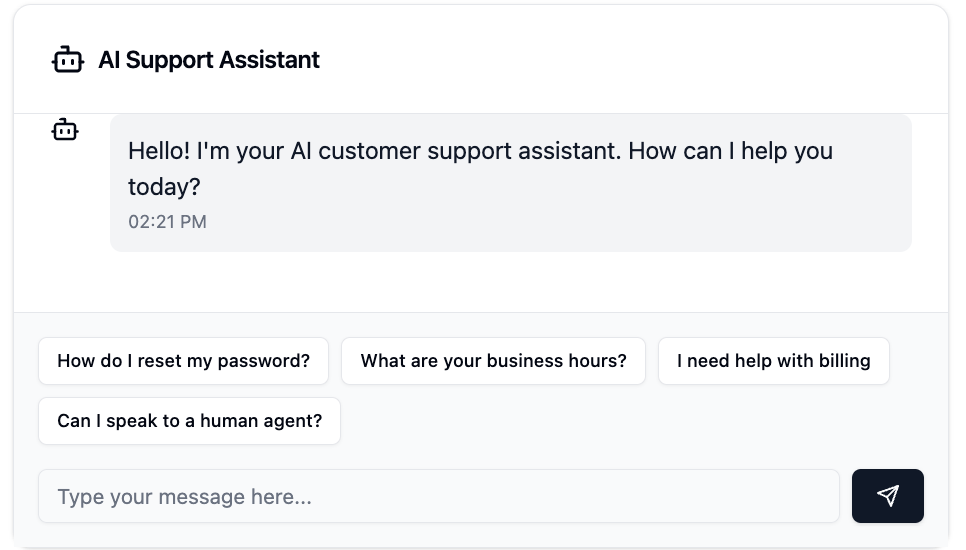
This is often the first question I get, and I love seeing people’s excitement when I say “Yes, you can!” Bubble is flexible enough to integrate with many AI services, and OpenAI’s API is one of the most powerful out there. The possibilities are endless – from generating creative content to analyzing user data and creating intelligent chatbots. With OpenAI, you can generate instant AI responses based on user queries, showcasing the seamless interaction flow between user input and the AI’s reply.

The Million-Dollar Question: Can I Use the OpenAI API for Commercial Use?
Before we get into the technical details, let’s answer another common question. Yes you can use OpenAI’s API for commercial use! However there are some things to consider:
-
You’ll need to pay for API usage based on tokens
-
Pricing varies by model
-
There are terms of service to follow
-
You’ll want to implement usage monitoring and rate limiting
I learned about usage monitoring the hard way – let’s just say my first month’s bill was a shock! Now I help other developers set up proper usage tracking from day one.
How Do I Add API to Bubble Using the API Connector Plugin? The Foundation of Integration
The process starts with Bubble’s API Connector. Think of it as a bridge between your app and external services. Here’s my step-by-step approach:
-
First install the API Connector plugin in your Bubble app
-
Create a new API in the connector settings
-
Set up your authentication
-
Configure your API calls by structuring and configuring the API requests. This involves constructing the API call body, initializing these calls, and integrating them into your workflows. Accurate setup is crucial for successful interactions with the API.
Understanding the API documentation is essential for accurate implementation. It helps you navigate specific API resources and implement features in your applications correctly.
It sounds technical but I promise it’s easier than you think. I’ve seen complete beginners do this in under 30 minutes!
How to Connect OpenAI to Bubble: A Step-by-Step Guide
Now for the good stuff – connecting OpenAI to your Bubble app. The Bubble API connector is a crucial tool for linking external APIs, allowing you to integrate services like OpenAI seamlessly. Here’s my step-by-step process, refined over dozens of implementations:
Setting up the completions API as a data function within the API connector involves configuring the model, prompt, temperature, and max tokens to effectively use OpenAI for tasks like text generation, summarization, and categorization.

1. Setting Up Your OpenAI Account and API Key
First things first: create an OpenAI account and obtain your API key:
-
Go to OpenAI’s website.
-
Create your account.
-
Go to the API section and generate your new secret key.
-
Save it in a secure place (and never share it publicly!).
Securing your API keys and utilizing them effectively within a development environment is essential, especially when integrating with platforms like Bubble.io.
2. Configuration
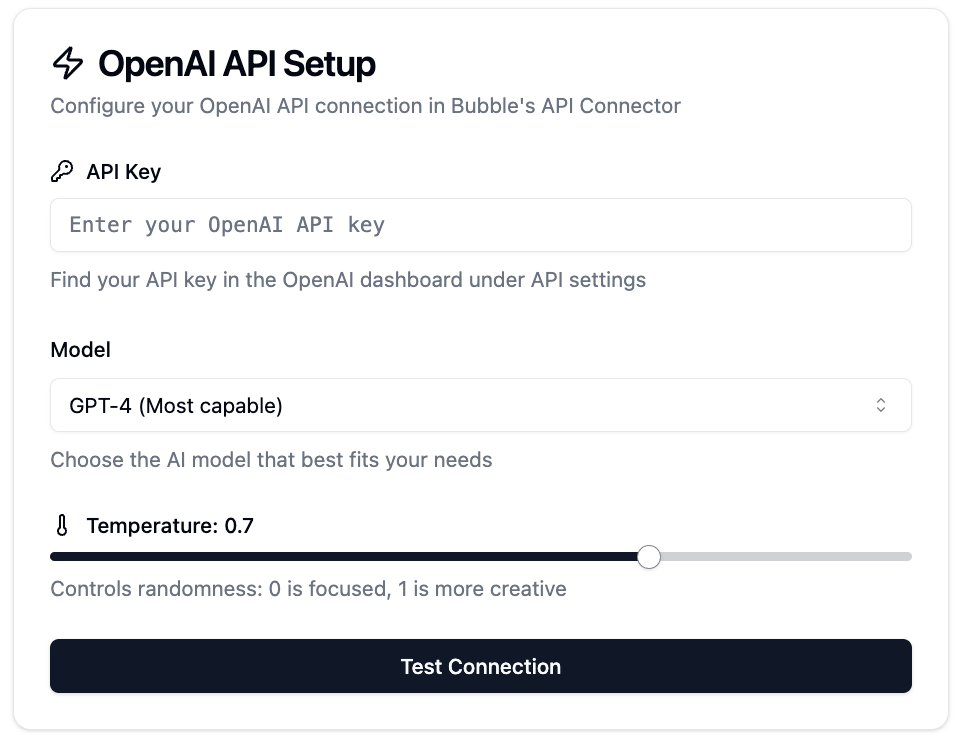
Now that you have your API key, let’s set up the connection in Bubble. Here’s where the magic happens: json
This is your entry point to AI features. I like to think of ‘temperature’ as the creativity dial – higher values give you more imaginative responses, lower values keep it focused and precise.
It is crucial to correctly configure the data source for displaying messages and ensuring that the application functions smoothly with the API.
Examples I’ve Seen in Real-World Apps
Let me show you some examples I’ve seen developers use this integration:
- Content Generation
-
Blog post drafting
-
Product descriptions
-
Social media content
-
Using multiline input for users to input multiple lines of content, which can then be processed to generate comprehensive AI responses
- Customer Service
-
Intelligent chatbots
-
Automated email responses
-
Support ticket classification
-
The AI processes each user’s message in a thread, ensuring effective management and response within custom chatbot functionalities

- Data Analysis
-
User feedback analysis
-
Market trend insights
Best Practices
After working with dozens of developers on their integrations, here’s what I recommend:
- Start Small
-
Start with basic text generation
-
Test thoroughly before scaling
-
Add complexity gradually
- Monitor Usage
-
Set up usage alerts
-
Track costs regularly
-
Implement rate limiting
- Optimize
-
Cache common responses
-
Use efficient prompts
-
Proper error handling
Common Issues and Solutions
Here are some issues I help other developers with:
To structure and configure an API call, it’s crucial to outline the steps for constructing the API call body, initializing these calls, and integrating them into workflows. This ensures accurate setup for successful interactions with the API.
API Response
The AI generates immediate AI responses based on user queries, highlighting the interaction flow between user input and the AI’s reply.
1. API Response
// Example of proper response
{
  “success”: true,
  “response”: {
    “text”: “AI-generated content”,
    “usage”: {
      “tokens”: 150
    }
  }
}

// The AI generates immediate AI responses based on user queries, ensuring a seamless interaction flow between user input and the AI's reply.
2. Cost
-
Token counting
-
Usage limits
-
Caching
3. Error
-
User-friendly error messages
-
Fallback options
-
Log for debugging
What’s Next: AI in Bubble
OpenAI in Bubble is just the start. As AI gets better, we’ll see:
-
More advanced language models
-
Better context awareness
-
More niche AI applications
-
Faster and more efficient
Get Started
If you’re ready to get started with OpenAI and Bubble, here’s what to do:
-
Start with a simple example. To integrate OpenAI, first, navigate to the plugins tab in Bubble.io, where you can find and add the API Connector plugin.
-
Test in dev
-
Monitor usage and costs
-
Scale as needed
Now it’s your turn to build
OpenAI in Bubble has changed the way I build apps and I can’t wait to see what you build. Everyone was a beginner once and the best way to learn is by doing.
Got questions about your integration? Comment below!
